


How to install latest LibreOffice version on Debian 10
Prerequisites
- The machine uses Debian 10.
- The user must be familiar with the Sudo command and be a sudo user.
Installing LibreOffice on Debian 10
For installing LibreOffice in Debian 10, you need to follow the following steps:
Step 1: Open the Terminal in Debian 10
Go to the bottom left of the Desktop and click on the Menu icon.

Go to the search bar on the top left.
Type “Terminal” there and click on the “Multilingual Terminal”.

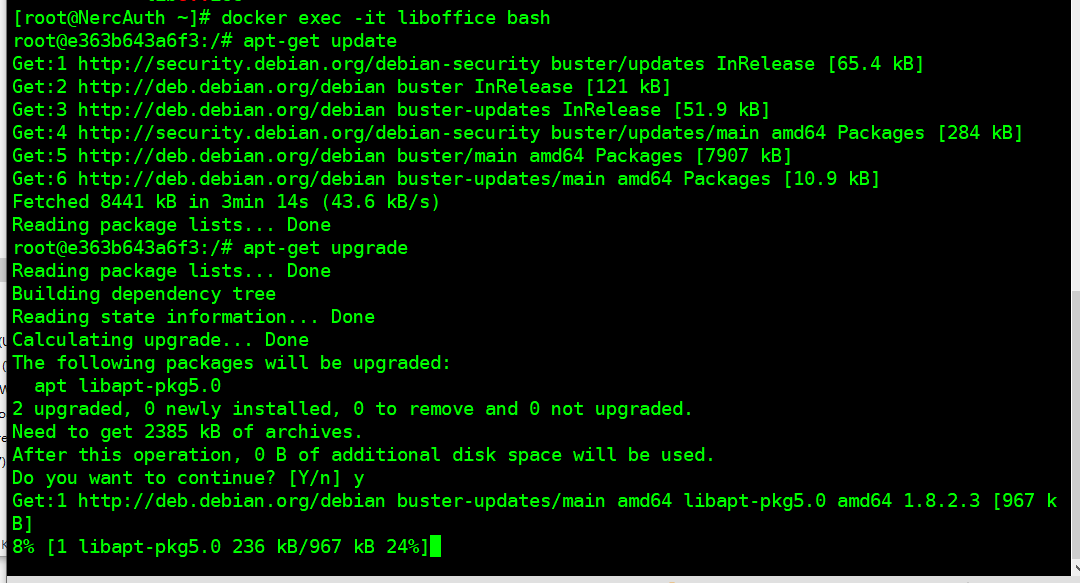
and update the system.
Step 2: Uninstall any pre-existing LibreOffice suite versions
If you have any pre-existing LibreOffice suite software in your machine or PC, you first have to uninstall it. By running the following command, you can uninstall any existing LibreOffice suite in your PC or a machine.
apt-get remove libreoffice-core
If you also want to remove the LibreOffice configuration files, run the following command:
apt-get remove --purge libreoffice-core
Running the above command will ask you for your confirmation whether you want to continue or not. Type “Y” and hit enter. On pressing enter, it will start uninstalling the configuration files of LibreOffice. On successful completion, it will give you the following display:
Step 3: Install LibreOffice version 6.4
Now to install the version 6.4 of LibreOffice, you need to follow sub-steps:
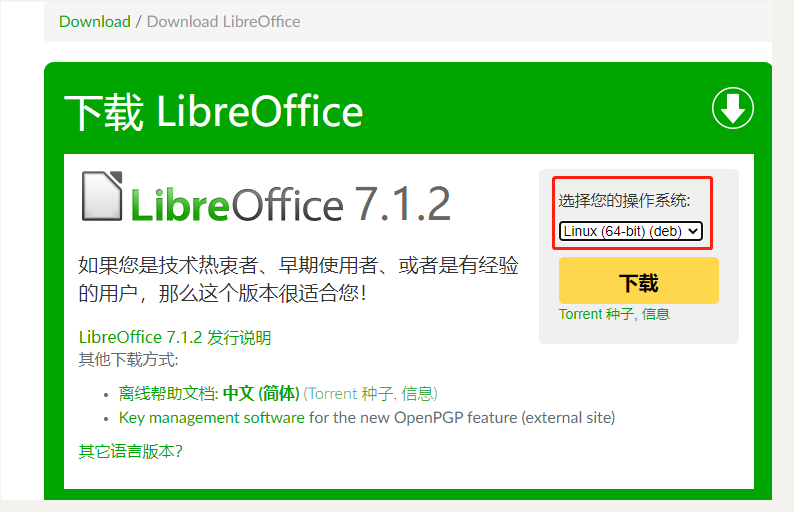
Step 3.1: Download the latest LibreOffice Debian packages
Go to the official download page of LibreOffice www.libreoffice.org/download/ and download the LibreOffice version 6.4. The user has the option of selecting 64-bit deb or 64-bit rpm depending upon his/her PC or work requirements. For this particular article, I am selecting Linux (64-bit) (deb) and click on Download.
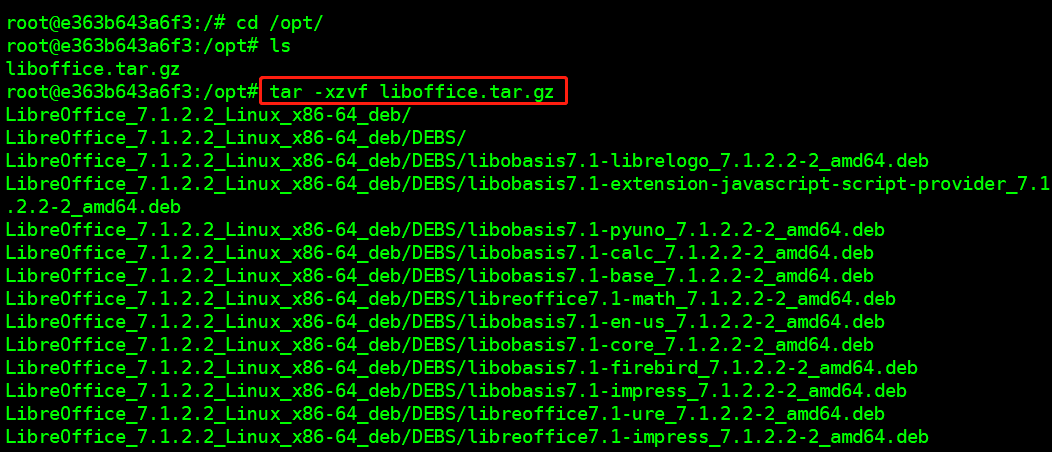
Step 3.2: Now extract the downloaded .deb packages
The .deb packages will be in the “Downloads” directory. The packages will be “compressed” and have a “file extension of .tar.gz”. Look in the Downloads for a file named as:
mv LibreOffice_7.1.2_Linux_x86-64_deb.tar.gz liboffice.tar.gz
tar -xzvf liboffice.tar.gz
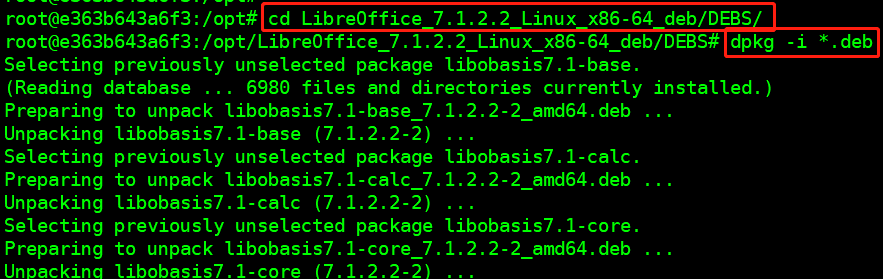
Step 3.3: Install LibreOffice .deb packages
Open the Debian Terminal. Go to the directory where .deb packages are present, which is in Downloads. Change the present directory by running the following command and press enter:
dpkg -i *.deb
Step 3.4: Launch LibreOffice
Now, after installing all of the .deb packages from the Downloads directory. You don’t need to restart your PC or machine. Launch the LibreOffice by running either of the following commands:
libreoffice7.1 --help
/opt/libreoffice7.1/program/oosplash: error while loading shared libraries: libXinerama.so.1: cannot open shared object file: No such file or directory

将所需要的libfile.tar.gz动态库文件全部打包并解压到/usr/local/lib/目录下,并执行
ldconfig

在CentOS系统中获取的Lib文件时需要删除这几个文件:
root@e363b643a6f3:/opt# rm -rf /usr/local/lib/libsystemd.so.0* libsystemd.so.0* libgpg-error.so.0* liblzma.so.5* libstdc++.so.6*
再次运行liboffice显示正常

关于后续操作详见JenkinsFile:
/*  MAINTAINER WinJayX <WinJayX@Gmail.com>
 *  LABEL description="This is Docs Transcoding Project"
 *  LABEL version="1.0"
 */

 //变量 branch 在参数化构建中添加

    //阶段1:拉取代码,node 节点未指定,则在Master执行,因为Git、Maven 环境都在 Master,所以就在主节点执行了
stage('Git Checkout') {
    node('MSBuild') {
       checkout([$class: 'GitSCM', branches: [[name: '${Branch}']], doGenerateSubmoduleConfigurations: false, extensions: [], submoduleCfg: [], userRemoteConfigs: [[credentialsId: '${Your Credential ID}', url: '${Your Project Address}']]])
    }
}

    //阶段2:Dotnet编译代码
stage('Build'){
    node('MSBuild') {
       echo '编译解决方案'
       bat "$DOTNET publish  -c Release -o \"${WORKSPACE}/publish\" \"src/FZ.Transcoding/FZ.Transcoding.SubscriberService\" "
    }
}

stage('Backup To The Site Directory'){
    node('MSBuild') {
        dir('publish') {
            bat "zip -r ${BUILD_NUMBER}.zip ./"
        }
        echo '拷贝文件至备份目录'
        bat "xcopy \"publish/${BUILD_NUMBER}.zip\" \"${BACKUP_SHARE_DIR}/${JOB_NAME}/\" /fyi "
        bat "rm -rf publish*"
   }
}

stage('Download Project Code'){
    node('TestEnv') {
        echo '建立业务目录'
        //sh "mkdir -p ${JOB_NAME} && cd ${JOB_NAME}"
        echo '下载程序'
        sh "curl -O ${PUBLISH_HOST}/${JOB_NAME}/${BUILD_NUMBER}.zip"
        echo '解压源程序'
        sh "unzip -o ${BUILD_NUMBER}.zip && rm -f ${BUILD_NUMBER}.zip"
    }
}


    //阶段3:构建Docker镜像并推送到私有仓库
stage('Build And Push Image') {
    node('TestEnv') {
sh '''
REPOSITORY=${Your Private Repositories Address}/sdk/subscriber_service:${ImageTag}
cat > Dockerfile << EOF
#注意选择镜像镜像版
FROM mcr.microsoft.com/dotnet/core/aspnet:3.1
MAINTAINER WinJayX <WinJayX@Gmail.com>
LABEL description="This is FZ.Transcoding.SubscriberService Project"
LABEL version="3.1"
USER root

###安装视频转码组件FFmpeg###
RUN apt-get update -y && apt-get upgrade -y
RUN apt install ffmpeg -y

###安装LibreOffice_7.1.2###
RUN curl -o /opt/LibreOffice_7.1.2_Linux_x86-64_deb.tar.gz \
https://mirrors.nju.edu.cn/tdf/libreoffice/stable/7.1.2/deb/x86_64/LibreOffice_7.1.2_Linux_x86-64_deb.tar.gz \
        && cd /opt \
        && tar -xzvf LibreOffice_7.1.2_Linux_x86-64_deb.tar.gz \
        && dpkg -i LibreOffice_7.1.2.2_Linux_x86-64_deb/DEBS/*.deb \
        && rm -rf /opt/LibreOffice* \
        && ln -s /usr/local/bin/libreoffice7.1 /usr/local/bin/libreoffice

###下载安装动态库文件###
RUN curl -o /usr/local/lib/libfile.tar.gz \
        https://img.winjay.cn/md/libfile-83138de2a6fb4777a7d4b74784626fb5.tar.gz \
        && cd /usr/local/lib/ && tar -xzvf libfile.tar.gz \
        && rm -rf libfile.tar.gz \
        && ldconfig


###安装中文字体###
RUN apt-get install -y fonts-noto-cjk

### 对连接sqlServer协议进行降级
RUN sed -i 's/TLSv1.2/TLSv1.0/g' /etc/ssl/openssl.cnf

WORKDIR /app

#将当前目录下的文件,复制到WORKDIR目录,适用于打包整个项目及DockerFile在一个包中的情况。
#如果有创建数据卷则需要运行时src=VolumeName,dst=/app挂载。
COPY . /app/

#项目变更时,注意修改.dll文件名称
ENTRYPOINT ["dotnet", "FZ.Transcoding.SubscriberService.dll"]

EOF

docker build -t $REPOSITORY .
docker login ${Your Private Repositories Address} -u $(user name) -p $(Password)
docker push $REPOSITORY
'''
    }
}

/*

    //阶段4:部署到远程Node Docker主机节点
stage('Deploy To The Test Server') {
    node('TestEnv') {
        sh '''
        REPOSITORY=${Your Private Repositories Address}/sdk/subscriber_service:${ImageTag}
        docker rm -f Robot || true
        docker container run -d \
        --volume /etc/localtime:/etc/localtime:ro \
        --restart always \
        --user root \
        --name Robot \
        --hostname Robot \
        -p 8007:80 $REPOSITORY
        '''
    }
}

    //阶段5:  获取站 站站点  的 的状态
//stage('Test the WebSite') {
//    node {
//        sh '''
//        curl -I -m 10 -o /dev/null -s -w %{http_code} 202.205.161.114:8001
//        '''
//    }
//}


stage('Deploying To The Production Server'){
    timeout(time: 1, unit: 'DAYS') {
    input message: 'Deploying To The Production Server?', ok: 'Deployment'
    }
}


    //阶段8:部署到生产环境服务器,||true 短路逻辑运算,只有前面返回假echo $? =1 时,后面才执行

stage('Deploy To The Production Docker Server') {
//      方式1
//    node {
//        sh '''
//        ssh root@serverip "cd /home/docker/003.CourseDetectionWeb ; sh docker_CourseDetectionSystem.start.sh"
//        '''
//    }

      //方式2
    node('Robot') {
        sh '''
        cd /mnt/Docker/002.Robot
        REPOSITORY=${Your Private Repositories Address}/sdk/subscriber_service:${ImageTag}
        docker rm -f Robot || true
        docker container run -d \
        --volume /etc/localtime:/etc/localtime:ro \
        --volume `pwd`/Config:/app/Config \
        --restart always \
        --user root \
        --name Robot \
        -h Robot \
        -p 8090:80 \
        $REPOSITORY
        '''
  }
}
*/


评论区