


1.开始安装MySQL5
首先我们应该先用下面的命令安装MySQL:
yum install mysql mysql-server
然后我们需要创建MySQL系统的启动键链接启动MySQL服务器,这样以便于MySQL在系统启动时自动启动
chkconfig –levels 235 mysqld on
/etc/init.d/mysqld start
为MySQL root帐户设置密码:
mysql_secure_installation
*SSH Secure Shell 3.2.9 (Build 283)
Copyright (c) 2000-2003 SSH Communications Security Corp – http://www.ssh.com/*

This copy of SSH Secure Shell is a non-commercial version.
This version does not include PKI and PKCS #11 functionality.

Last login: Wed Aug 14 15:56:26 2013 from 10.191.197.39
[root@NercDev ~]# mysql_secure_installation

NOTE: RUNNING ALL PARTS OF THIS SCRIPT IS RECOMMENDED FOR ALL MySQLSERVERS IN PRODUCTION USE! PLEASE READ EACH STEP CAREFULLY!

In order to log into MySQL to secure it, we’ll need the current
password for the root user. If you’ve just installed MySQL, and
you haven’t set the root password yet, the password will be blank,
so you should just press enter here.

Enter current password for root (enter for none):
ERROR 1045 (28000): Access denied for user ‘root’@’localhost’ (using password: YES)
Enter current password for root (enter for none):
ERROR 1045 (28000): Access denied for user ‘root’@’localhost’ (using password: YES)
Enter current password for root (enter for none):

***# 我艹,装完MySql后默认的密码是空啊。。。是没有密码的。。大家一定要知晓啊!!!**


*OK, successfully used password, moving on…*

Setting the root password ensures that nobody can log into the MySQL
root user without the proper authorisation.

Set root password? [Y/n] y #设置Root密码
New password:
Re-enter new password:
Password updated successfully!
Reloading privilege tables..
… Success!

By default, a MySQL installation has an anonymous user, allowing anyone
to log into MySQL without having to have a user account created for
them. This is intended only for testing, and to make the installation
go a bit smoother. You should remove them before moving into a
production environment.

Remove anonymous users? [Y/n] y
… Success!

Normally, root should only be allowed to connect from ‘localhost’. This
ensures that someone cannot guess at the root password from the network.

Disallow root login remotely? [Y/n] y
… Success!

By default, MySQL comes with a database named ‘test’ that anyone can
access. This is also intended only for testing, and should be removed
before moving into a production environment.

Remove test database and access to it? [Y/n] y
– Dropping test database…
… Success!
– Removing privileges on test database…
… Success!

Reloading the privilege tables will ensure that all changes made so far
will take effect immediately.

Reload privilege tables now? [Y/n] y
… Success!

Cleaning up…

All done! If you’ve completed all of the above steps, your MySQL
installation should now be secure.

Thanks for using MySQL!

#到此 MySql 设置完成
[root@NercDev ~]# mysql -u root -p
Enter password:
Welcome to the MySQL monitor. Commands end with ; or \g.
Your MySQL connection id is 19
Server version: 5.1.69 Source distribution

Copyright (c) 2000, 2013, Oracle and/or its affiliates. All rights reserved.

Oracle is a registered trademark of Oracle Corporation and/or its
affiliates. Other names may be trademarks of their respective
owners.

Type ‘help;’ or ‘\h’ for help. Type ‘\c’ to clear the current input statement.

mysql> show databases;
+——————–+
| Database |
+——————–+
| information_schema |
| mysql |
+——————–+
2 rows in set (0.00 sec)

mysql> exit
Bye
[root@NercDev ~]#
2.安装Apache2
Apache2的是作为一个CentOS的软件包,因此我们可以直接用下面命令安装它:
yum install httpd
现在配置系统在引导时启动Apache
chkconfig –levels 235 httpd on
并启动Apache
/etc/init.d/httpd start
vi /etc/httpd/conf/httpd.conf
找到#ServerName www.example.com:80
在下面添加上这么一行 ServerName 202.205.XXX.XXX:80(不知道是不是画蛇添足)
最后一定要关掉防火墙
service iptables stop
或者将80端口添加到防火墙里面
现在,您的浏览器到http://202.205.XXX.XXX,你应该看到Apache2的测试页:
Apache的默认文档根目录是在CentOS上的/var/www/html 目录 ,配置文件是/etc/httpd/conf/httpd.conf。配置存储在的/etc/httpd/conf.d/目录。
3.安装PHP5
我们可以用下面的命令来安装PHP5
yum install php
安装完需要重启
/etc/init.d/httpd restart
我们可以安装PHP5和Apache的PHP5的模块如下:
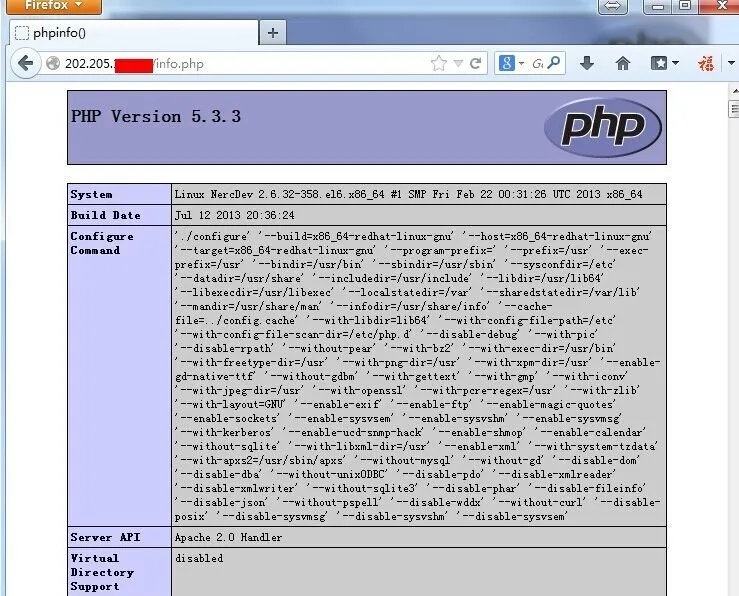
默认网站的文件根目录是在/srv/www/html中。现在我们将在该目录中创建一个小型PHP文件(info.php的)在浏览器中调用它。该文件将显示很多关于我们的PHP安装,如安装的PHP版本和有用的一些细节。
vi /var/www/html/info.php
现在,我们可以用浏览器访问例如http://202.205.XXX.XXX/info.php文件
正如你所看到的,PHP5的工作,它通过Apache 2.0的处理程序,在服务器API线。如果你继续向下滚动,你会看到所有在PHP5中已经启用的模块。MySQL是没有列出,这意味着我们没有在PHP5支持MySQL。
PHP5获得MySOL的支持
让PHP在MySQL中获得支持,我们可以安装的php-mysql软件包。安装一些其他的PHP5模块,以及您可能需要的应用程序,这是一个好主意:
yum search php
还安装需要安装的
yum install php-mysql php-gd php-imap php-ldap php-mbstring php-odbc php-pear php-xml php-xmlrpc
现在重新启动Apache2的:
/etc/init.d/httpd restart
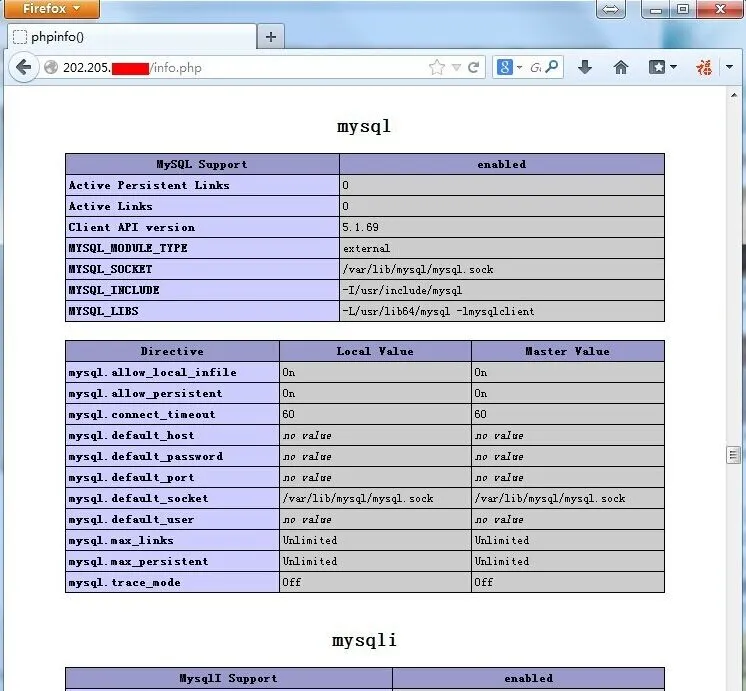
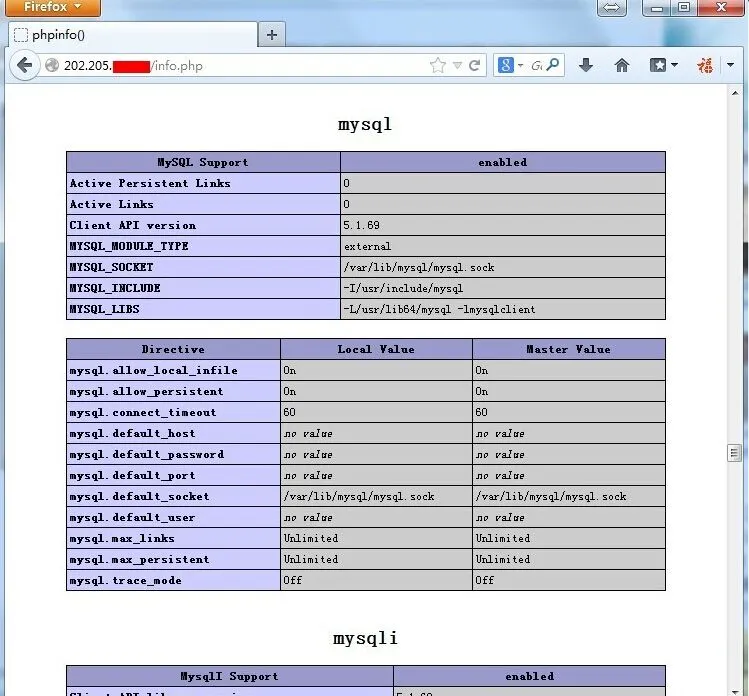
现在,重载http://202.205.XXX.XXX/info.php在您的浏览器,并再次向下滚动到模块部分。现在,你应该找到许多新的模块,包括MySQL模块:
安装phpMyAdmin
phpMyAdmin是一个网络接口,通过它可以管理你的MySQL数据库。
首先,我们使CentOS系统RPMForge软件库的phpMyAdmin,而不是官方的CentOS 6.2库:
所以需要导入RPMForge的GPG密钥:
rpm –import http://dag.wieers.com/rpm/packages/RPM-GPG-KEY.dag.txt
x86_64系统:
yum install http://pkgs.repoforge.org/rpmforge-release/rpmforge-release-0.5.2-2.el6.rf.x86_64.rpm
在i386系统:
yum install http://pkgs.repoforge.org/rpmforge-release/rpmforge-release-0.5.2-2.el6.rf.i686.rpm
安装phpmyadmin
yum install phpmyadmin
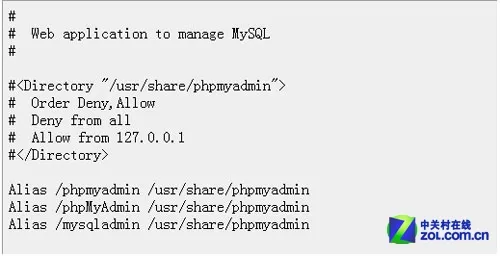
现在我们可以设置phpMyAdmin,了我们可以改变Apache的配置来让phpMyAdmin不仅仅只能从localhost登录。
vi /etc/httpd/conf.d/phpmyadmin.conf
下一步,我们从HTTP改变的phpMyAdmin的cookie来身份验证:
vi /usr/share/phpmyadmin/config.inc.php

重启阿帕奇
/etc/init.d/httpd restart
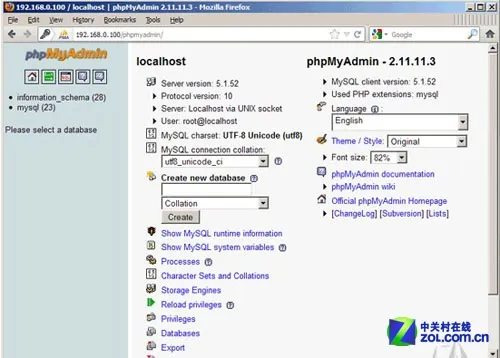
在地址栏输入http://192.168.0.100/phpMyAdmin/你就可以访问phpMyAdmin了。
CentOS可以得到RHEL的所有功能,甚至是更好的软件。但CentOS并不向用户提供商业支持,当然也不负上任何商业责任。如果你要将你的RHEL转到CentOS上,因为不希望为RHEL升级而付费。当然,你必须有丰富linux使用经验,因此RHEL的商业技术支持对你来 说并不重要。但如果你是单纯的业务型企业,那么还是建议你选购RHEL软件并购买相应服务。这样可以节省你的IT管理费用,并可得到专业服务。由此,对于CentOS 6.2下搭建Web服务器简单的介绍的了解,以及与Apache2、PHP5、MySQL进行更加紧密的结合使用,相信企业用户更能从CentOS系统上获取商业上真正应用需求。


评论区